If your house tiling is looking dingy, it may be time to consider a refinishing project. Keep reading to learn how to grout wall tiles. Follow this simple, do-it-yourself approach to grouting and regrouting tiles so you may rediscover the joy of your house.
Make sure grout is ready before you begin.
For powdered grout, add water to a bucket before adding the grout. You’ll acquire the ice cream-like consistency by using a stick to mix and adding more grout as needed.
Grouting Step 2
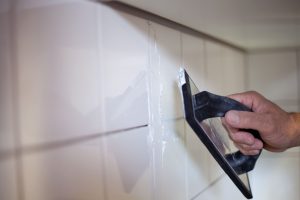
Use a squeegee or a grout spreader to apply the grout to the tile. The best way to fill up the gaps between tiles is to use some grout. At a 45-degree angle, it’s best to work.
Avoid the risk of it drying before it’s in place by working in small sections at a time.
- Fill in the voids with the grout.
Grout hardens after application, so work it into the cracks while it’s still pliable. Wipe off the excess with a moist sponge after checking the drying times on the box. Wait 10 minutes then go over with a damp sponge again.
NEVER ADD WATER TO THE GROUT TO MAKE IT EASIER TO SPREAD, AS THIS WEAKENS THE GROUT!
- Protect the grout using a caulking gun.
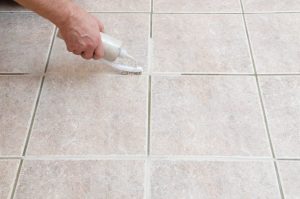
To make it waterproof, you’ll need to seal all of the seams. Use the correct grout sealer for your project – always follow the directions. Apply two coats of sealant to the joints. To avoid damaging particular tiles, make sure to wipe away any drips as soon as they appear.
The grout should be allowed to dry for a few days before it can be used.
The manufacturer’s instructions should be followed. After it has dried, use a polishing cloth to give it a final shine.
wall tiles without gaps grout
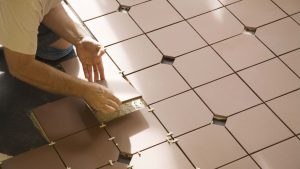
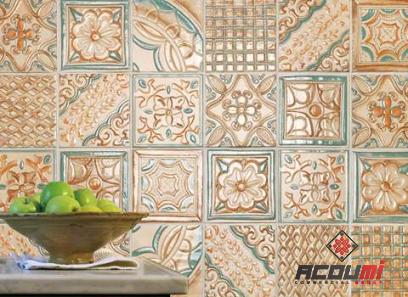
Taking the time and being precise is expected. Sometimes laying wall tiles without grout looks better.
To make the job last, use gaps grout. Groutless tile is more likely to break, requiring rework.
This article discusses why tilling without grout is useless and why you should use traditional methods.
Chances are, your tiles aren’t all the same size. Small variances may be tough to discern without measurement, yet they can interfere with groutless installation. When you place the tiles together, the imperfections will add up and look unprofessional. After hourslaborbour, you don’t want to find misaligned tiles.
Grout masks and controls tile size disparities. Even minor lines can make tiles match precisely, creating a symmetrical aesthetic.
If your tiles aren’t grouted, components may get between them. Dust, dead cells, and other material can get between tiles, no matter how dense they are. Grout prevents this.
You can spend hours fitting tiles together and be satisfied. Without grout, the area between tiles would grab trash like a magnet. These little tile discrepancies will gather enough dust and debris to spoil the ensemble.
Don’t presume you can clean tiles after installation. Even the tiniest mistake can destroy a tile, requiring you to work longer than expected.
Use grout while installing tiles to avoid this issue.
Yes, grout less tile installation is technically possible, but it’s not worth it. Skipping tile grout has three downsides: Unaligned tiles can be damaged by dirt and movement.
What if a client skips grout? Try to dissuade them. Try to help them realize why grout is necessary. Some want a compact aesthetic and think grout distorts tile design. Make them see the long-term benefits of grout. Many will prefer something that lasts longer than “looking lovely” for a few months.
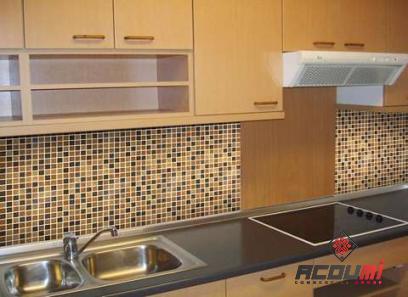
wall tiles without grout
Grout adds time, money, and aesthetics to your project. Grout is dirty. “Can you tile without grout?”
No, sadly. Not without grout. Grout protects wall tiles and tiled walls. If you hate grout lines, you can minimize them.
How to do that?
Having to mix grout, apply it, and wipe off excess adds extra labor. It’s exhausting when you just want to be done. Grout may seem like a superfluous step, but it’s important for any tiling process.
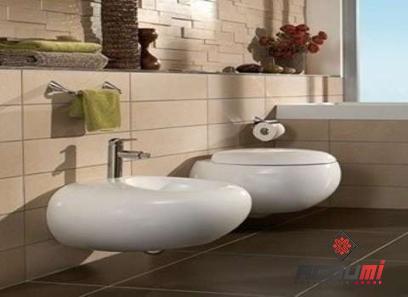
Tile is most common in the kitchen and bathroom. Both places produce lots of moisture. The kitchen adds food spills. Grout prevents water and food from getting behind tiles. Walls or floors can be damaged, and mold can form behind tiles.
When you put tiles, they press against one other. As you add tiles, the tiles above the bottom row add more pressure. Grout provides a “cushion” for tiles. This prevents breaks. This reason goes along with the first. Even if tiles don’t fracture under pressure, they can shift owing to weight or house movement. Grout protects tiles from shifting as it hardens. It helps keep tiles straight.
Purchase rectified tiles with a 0.0025-inch variance or less to eliminate grout. The tiles may not need grout if they fit so closely. More variance means greater tile joints. This boosts grout to use.
Rectified tiles are readily available. Porcelain or ceramic is negative. If you prefer a different material, rectified tile may not work.
Grout does more than keep tiles in place. Grout protects walls or floors from excess moisture and keeps tiles from separating. Even a slight gap between tiles lets water pass. Even if you buy corrected tiles, apply grout.

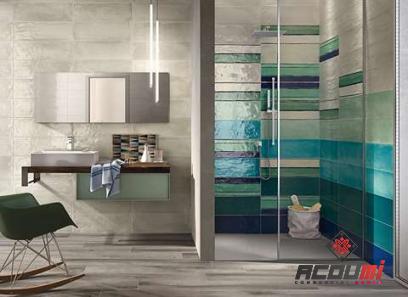
wall tile quick grout
Grout makes tile surfaces more appealing and strengthens their structure. Even if you’ve never grouted before, you can do it yourself in a quick way with the right tools and technique. Grouting doesn’t require a professional and may be done quickly.
- Remove adhesive
Remove any glue or contaminants from grout lines. A razor knife or utility knife will do. You don’t need to remove all dirt, just sticky residue or anything protruding from the joint.
Wet the grout lines. This helps the grout adhere to cement. Do not saturate the joints, but only dampen them softly right before you go to work.
Mix grout
Add enough powder grout to cover 2 to 3 inches of water in a bucket. Firmly combine water and grout. If needed, add more water or grout. Home remodeling expert Tim Carter recommends a thick cake batter consistency.
- Use a Grout Float Scoop grout onto a grout float to restore the grout. A grout float is a flat, grout-specific trowel. Home improvement stores sell them. Holding the float at a 45-degree angle, press grout into tile joints. Apply grout rapidly by gliding the float along the grout lines. The grout on the tiles is fine.
Wipe away excess grout from the float, then press it diagonally across the tiles to remove grout outside the joints. This stage requires a flat float. This makes cleanup easier.
- Dry grout
Remove excess grout with a moist sponge. Since you removed most of the grout, this should be quick. Tulsa Grout Restoration advises waiting two hours after grouting the tile to lightly walk on it. Wait a week before moistening grout.
Small, manageable portions are best for grouting. Fill the joints over two square feet, remove excess grout, sponge the area, and repeat until finished. Do not grout a whole tile surface before cleaning.
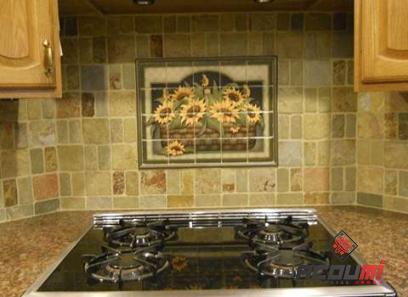
when to grout wall tiles
Grouting is a time-sensitive process that requires careful planning. While it may seem like a small detail, when and where you grout can have a significant impact on your final product. Here are some of the most common questions I receive.
How long can you wait before grouting?
The tile should be injected at least 24 to 48 hours after being tilled. Before grouting, the mortar used to secure the tiles to the surface must be dry. Cement, fine sand, and water-retaining ingredients make up the mortar and adhesive used to adhere the tiles to the floor or walls.
When does your grouting start?
For this reason, it’s always best to do your grouting as soon as possible after getting an injection. You don’t want the tiles to fall off if the glue doesn’t stick, therefore I always grout the next day.
Tiling and grouting in one day
There are, however, tiny containers with quick adjustment that are set up in less than 2 hours. With these sets, it’s safe to set and slide at the same time.
What happens if you apply the slurry too early?
It’s also possible that moisture in the mortar will cause problems with the grouting and cause the grout to turn yellow. Injecting before the dilution has dried causes the tiles to become loose or crack. A change in hue occurs in the slurry used to cover the unbaked mortar.
Cleaning the slurry after how long should be allowed to take place.
Dispose of the surplus grout with a wet sponge after 15 to 30 minutes of standing time has passed. It’s possible you’ll have to work in smaller portions if grouting all the tiles and preparing to clean takes more than 30 minutes.
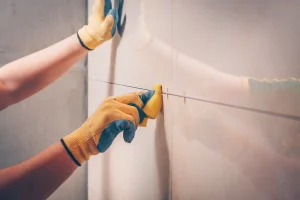
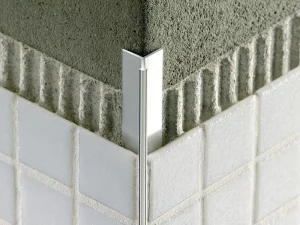
wall tiles edge trim
Tiles made of ceramic are utilized in a significant number of construction projects around the globe. These days, new models and styles as well as new auxiliary tools for ceramic wall tiles like edge time are accessible in global markets. These innovations can increase the beauty and overall appearance of port ceramic tiles.
Ceramic tiles might lose some of their quality as well as their ability to perform correctly in corners. In order for these edge times to spin, they must be positioned in the nooks and crannies of the walls or in the space between the walls and the floor. This can hide flaws and also assist bring out the beauty of ceramic tiles.
Ceramic tile edging can be crafted from a wide range of materials, including iron, plastic, and metal, to name a few. However, ceramic tile edging crafted from metal and plastic is more widely used than other types. Extremely flexible and long-lasting, plastic edges are available. Plastic comes in a wide range of hues, which is a benefit to the field of architecture due to the fact that it can be molded into a number of shapes. Aluminum and steel are the two most common elements utilized in the manufacturing of metals. They come in a variety of colors, albeit the metallic trim hues have fewer options than the plastic ones do.


Your comment submitted.