A glass tile backsplash can transform the look and feel of your kitchen or bathroom, adding a touch of elegance and sophistication to the space. Installing a glass tile backsplash yourself can be a rewarding DIY project that allows you to customize the design to suit your personal style and preferences.

.
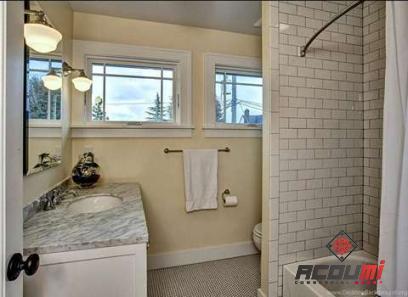
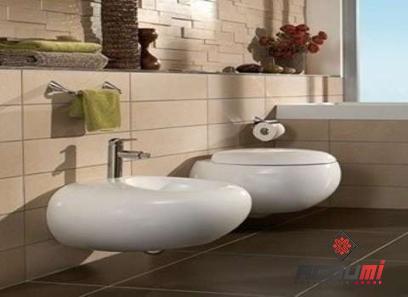
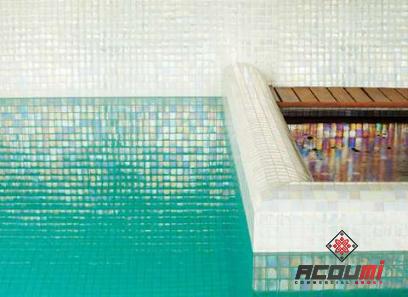
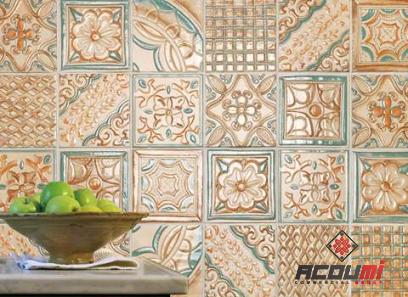
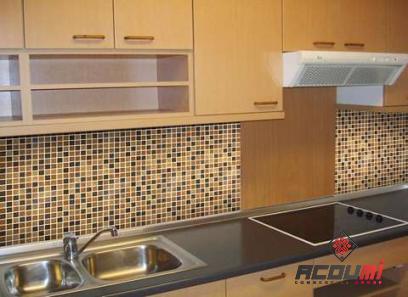
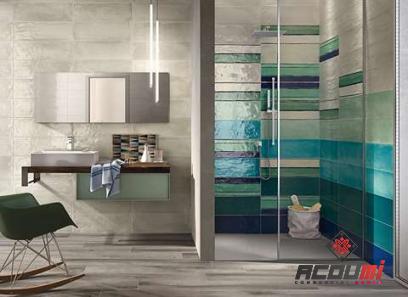
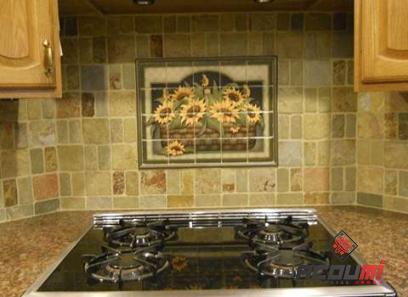
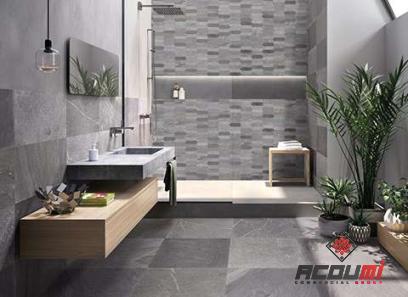 In this article, we will guide you through the process of installing a glass tile backsplash in your home, from choosing the right materials to completing the installation with professional-looking results. Choosing the Right Glass Tiles: When it comes to selecting glass tiles for your backsplash, you will find a wide variety of colors, sizes, shapes, and finishes to choose from. Consider the overall aesthetic of your kitchen or bathroom, as well as your personal style preferences, when selecting the right glass tiles for your project. If you prefer a modern and sleek look, consider choosing larger glass tiles in a neutral color such as white, gray, or black. These tiles will create a clean and minimalist look that can complement a variety of design styles. For a more vibrant and colorful backsplash, opt for smaller glass tiles in bright and bold hues. These colorful tiles can add a pop of personality and visual interest to your space, making a bold statement in your kitchen or bathroom. In addition to color and size, you can also choose from a range of finishes for your glass tiles, including glossy, matte, frosted, and iridescent. Each finish offers a unique look and feel, so be sure to consider how the finish will impact the overall appearance of your backsplash. Preparing Your Space: Before you begin the installation process, it is important to properly prepare the space where you will be installing the glass tile backsplash. Start by clearing the area of any debris, removing outlet covers, and cleaning the walls to ensure a smooth and clean surface for the tiles. Next, use a level and a pencil to mark a guideline on the wall where you will be installing the tiles. This guideline will help you ensure that the tiles are installed in a straight and even line, creating a professional-looking finish. Installing the Glass Tiles: Begin the installation process by applying a thin layer of adhesive or mortar to the wall using a trowel. Make sure to work in small sections to prevent the adhesive from drying out before you can install the tiles. Place the glass tiles onto the adhesive, starting at the bottom of the backsplash and working your way up. Use tile spacers to ensure that the tiles are evenly spaced and aligned properly. Press each tile firmly into place to secure it to the wall.
..
 Continue installing the tiles in this manner, working in small sections until the entire backsplash is covered. Once all of the tiles are in place, allow the adhesive to dry according to the manufacturer’s instructions before proceeding to the next step. Grouting and Sealing the Tiles: Once the adhesive has dried, it is time to grout the glass tiles to fill in the spaces between them and create a cohesive look. Mix the grout according to the manufacturer’s instructions and apply it to the tiles using a grout float, pressing it into the spaces between the tiles. After applying the grout, use a damp sponge to wipe away any excess grout from the surface of the tiles. Rinse the sponge frequently to ensure that you are not spreading grout residue over the tiles. Allow the grout to dry for the time specified by the manufacturer before applying a sealer to the tiles. A sealer will help protect the glass tiles from water and stains, ensuring that your backsplash remains looking beautiful for years to come. Maintaining Your Glass Tile Backsplash: To keep your glass tile backsplash looking its best, it is important to clean and maintain it regularly. Use a mild soap and water solution to clean the tiles, avoiding harsh chemicals that can damage the finish of the glass. In addition to regular cleaning, consider resealing the tiles every few years to ensure that they remain protected and looking their best. With proper care and maintenance, your glass tile backsplash will continue to enhance the beauty of your kitchen or bathroom for years to come. In conclusion, installing a glass tile backsplash is a rewarding DIY project that can add style and sophistication to your home. By choosing the right glass tiles, preparing the space properly, and following the installation steps carefully, you can create a stunning backsplash that reflects your personal style and enhances the overall aesthetic of your space.
…
 So why wait? Transform your kitchen or bathroom with a beautiful glass tile backsplash today! Installing a glass tile backsplash can be a rewarding and transformative DIY project that adds a touch of elegance and style to your kitchen or bathroom. With a wide variety of colors, sizes, shapes, and finishes available, you have the freedom to customize the design to suit your personal preferences and the overall aesthetic of your space. When selecting glass tiles for your backsplash, consider factors such as color, size, shape, and finish to create the look you desire. Larger neutral-colored tiles can provide a modern and minimalist feel, while smaller colorful tiles can add a vibrant and playful touch to your space. Choose a finish that complements your design style, whether it’s glossy for a sleek look, matte for a softer feel, frosted for a subtle elegance, or iridescent for a touch of shimmer. Proper preparation is crucial for a successful installation. Clear the area of debris, remove outlet covers, and clean the walls to ensure a smooth surface for the tiles. Mark a guideline on the wall to help you maintain a straight and even line during installation. The installation process involves applying adhesive or mortar to the wall in small sections and placing the glass tiles onto it, starting at the bottom and working your way up. Use tile spacers to maintain even spacing and alignment. Press each tile firmly into place to secure it properly. Allow the adhesive to dry before grouting the tiles to fill in the spaces between them. Wipe away excess grout with a damp sponge and seal the tiles to protect them from water and stains. Regular cleaning and maintenance are essential to preserve the beauty of your glass tile backsplash. Use a mild soap and water solution to clean the tiles and avoid harsh chemicals that could damage the finish. Consider resealing the tiles every few years to ensure long-lasting protection and beauty. By following these steps and guidelines, you can create a stunning glass tile backsplash that enhances the aesthetic of your kitchen or bathroom and reflects your personal style. So why not embark on this DIY project today and transform your space with a touch of elegance and sophistication? With careful planning, proper installation, and regular maintenance, your glass tile backsplash will continue to shine bright for years to come.


Your comment submitted.